
Build a doorbell that talks back with Toskar
· The Toskar team · 8 min read
When someone walks up to your front door, Toskar greets them through the doorbell's speaker in its own voice, then talks with them. It finds out who came and why, and sends you a notification with a short summary. Nobody has to press the button. Everything runs on your own computer and your own network, with no cloud service in between.
Here it is at a real front door: walking up, the greeting, and the conversation that follows.
What happens on each visit
- The doorbell's camera sees a person. Pressing the button works too.
- Toskar greets them right away, such as "Hello! How can I help you?", in the automation's language.
- It listens through the doorbell's microphone, and answers each time the visitor stops talking. A Front door profile decides what it says.
- Once it knows who came and why, it says goodbye. It keeps listening for another minute, in case the visitor has more to say.
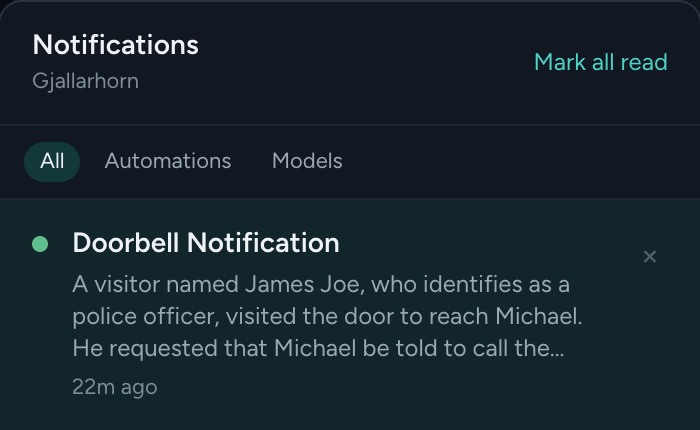
- You get a notification with a short summary of the visit and everything that was said.
One visitor gets one conversation: after a visit, Toskar waits a few minutes before it greets again. Quiet hours, such as 10 PM to 7 AM, keep it silent at night. You still get the notification.
What you need
| What | Why | Notes |
|---|---|---|
| A Reolink doorbell or camera with a speaker and microphone | Sees people, plays Toskar's voice, and hears the visitor | Tested on a Reolink Video Doorbell WiFi paired to a Home Hub Pro. A camera on its own works the same way. |
| A computer running Toskar 1.14 or later | Runs the models, the voice, and the automation | It must be on the same network as the doorbell. |
| A model from the Models page | Talks with the visitor and sums up the visit | Any chat model works. For the greeting-only setup at the end of Step 5, pick one that can see pictures. |
| Speech | Toskar's own voice, and its listening | Toskar installs them the first time it reads aloud or listens. After that they work offline. |
| reolink-cli | Speaks and listens through the doorbell | Reolink's own command-line tool, free and LAN-only. Toskar runs it for you with the doorbell's address and login. |
| ffmpeg | Turns what the doorbell's microphone hears into audio Toskar can understand | Free. On a Mac, brew install ffmpeg. |
| An Admin account in Toskar | Only Admins can give an automation a camera or a speaker |
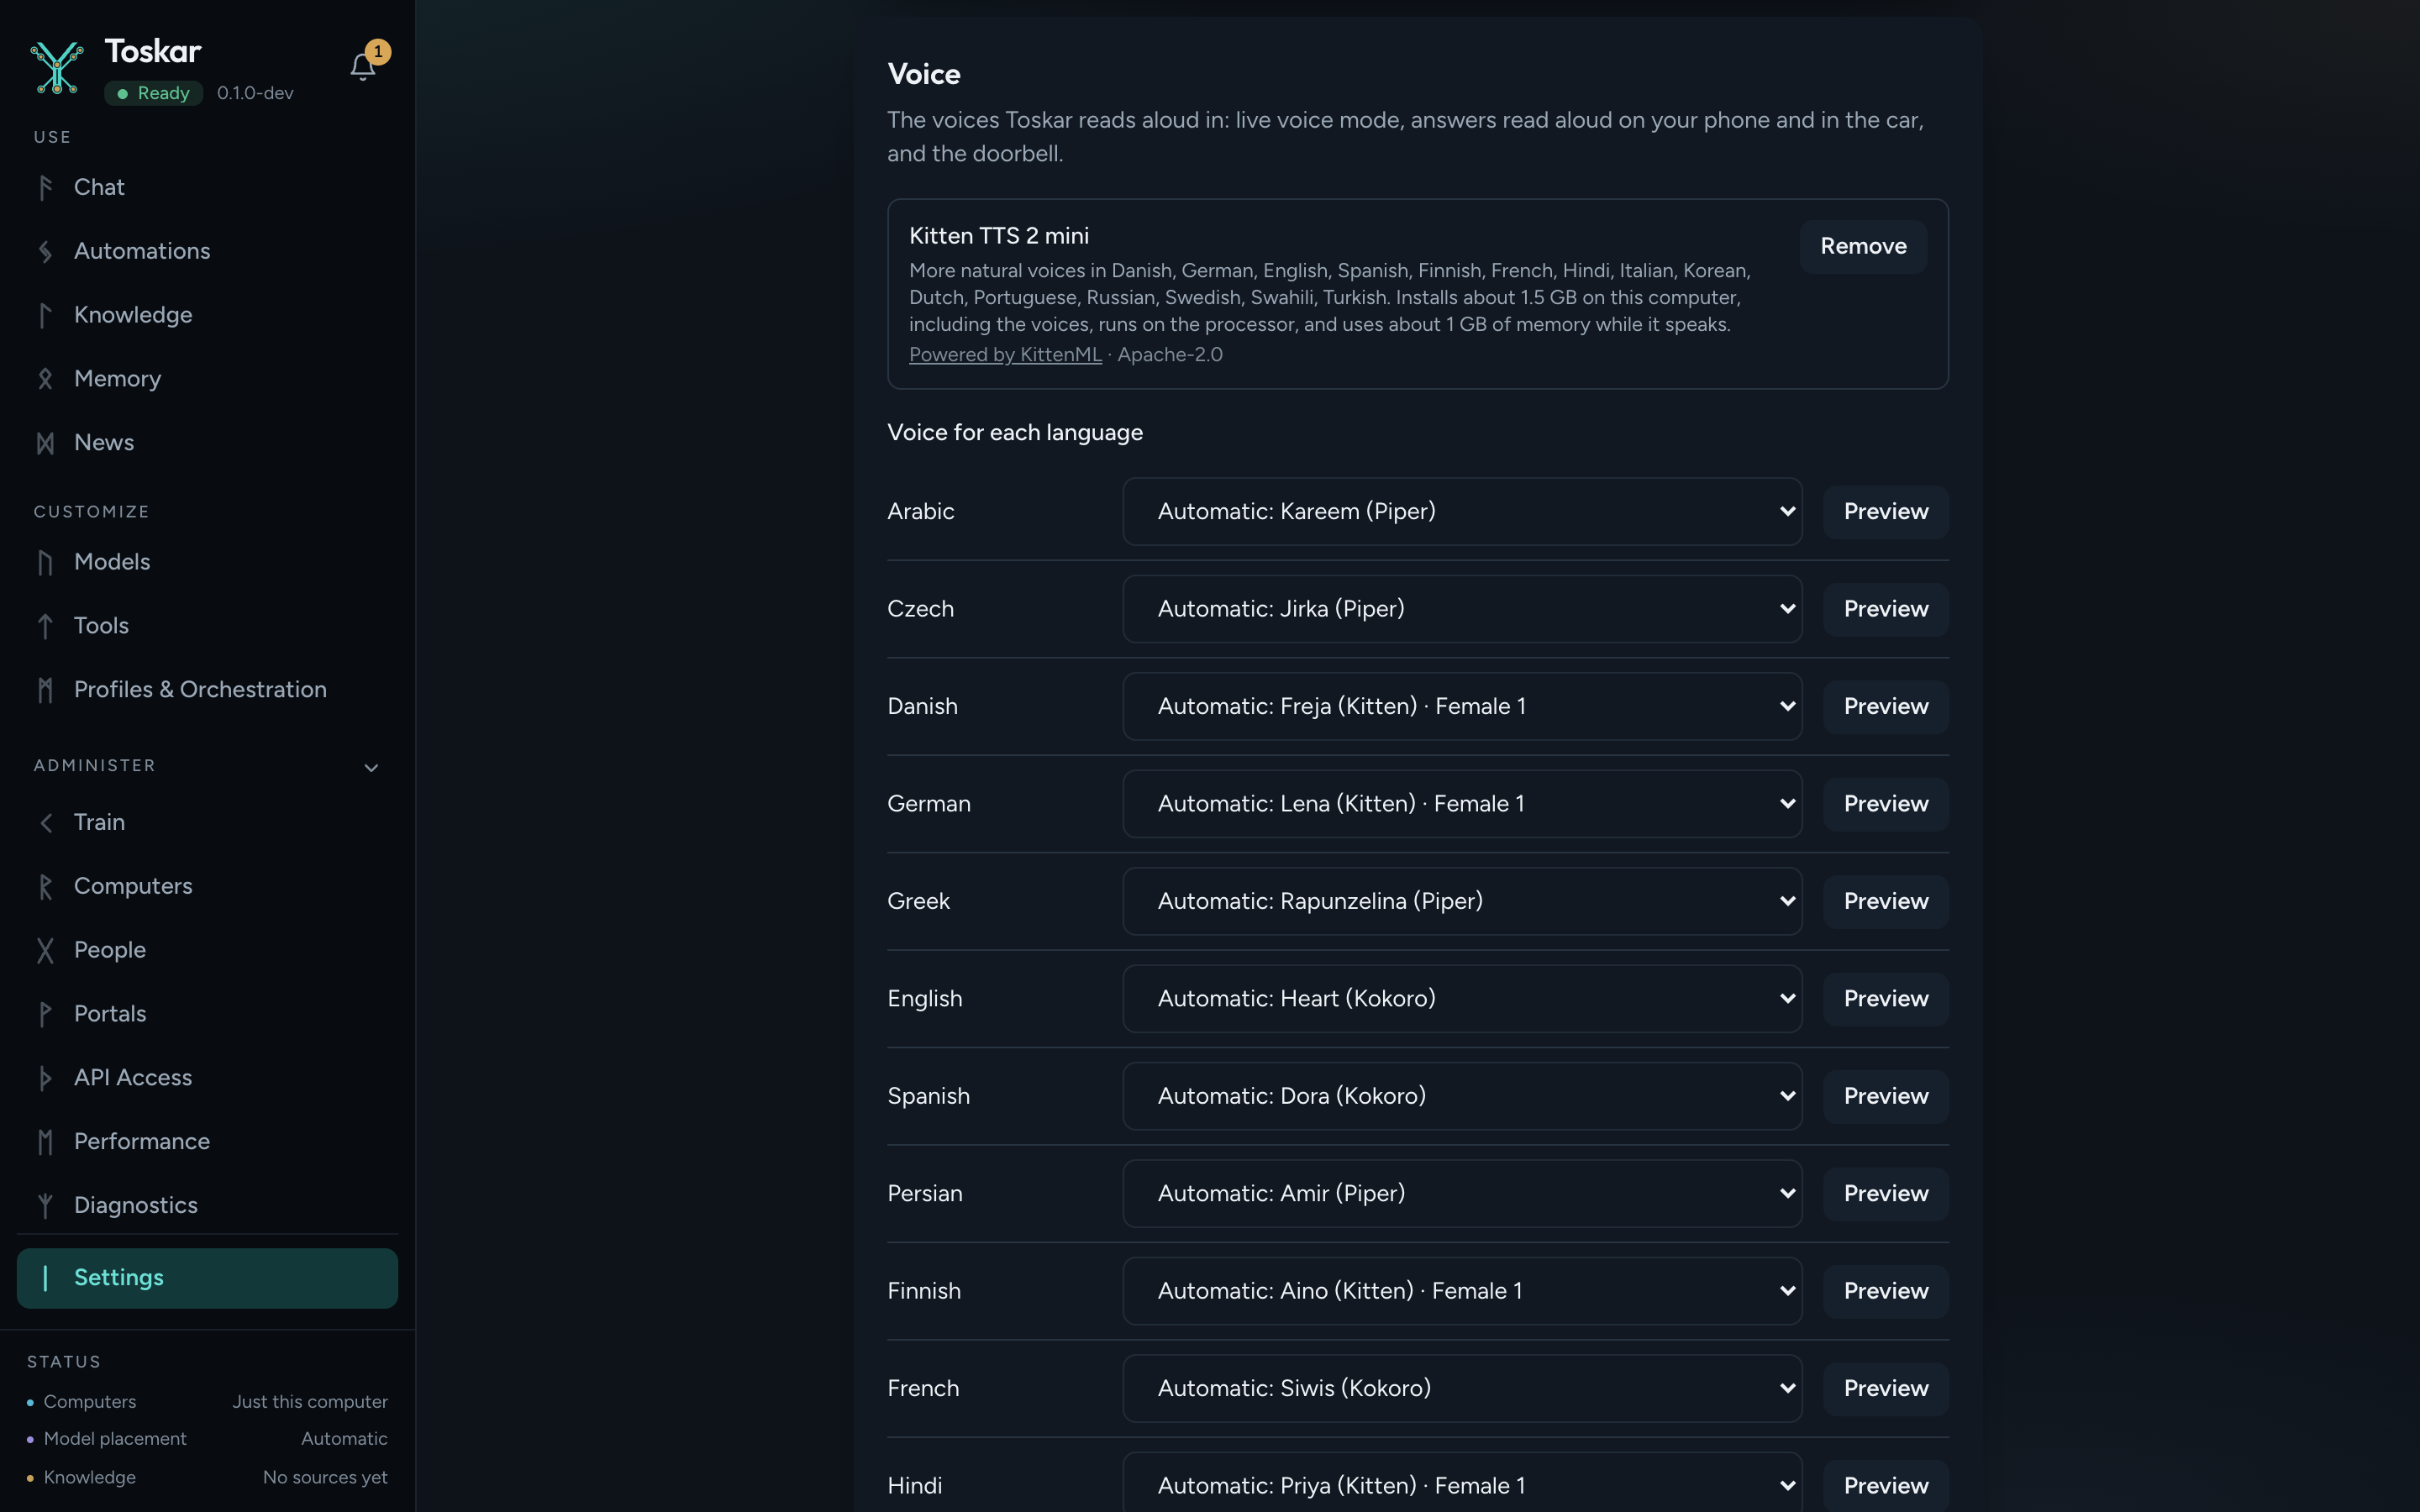
Toskar's voices live in Settings › Voice. Installing Kitten TTS 2 mini there adds more natural voices in many languages, and the doorbell can speak in any of them. The video uses Kitten's Eleanor.
Step 1: Prepare the doorbell
Give Toskar its own sign-in on the doorbell, and turn on the web server that Toskar talks to.
- In the Reolink app, open the doorbell (or the Home Hub it's paired to) and go to Settings › Advanced › User Management. Add a user for Toskar with its own password.
- Go to Settings › Network › Advanced › Server Settings and turn on the HTTPS server, or HTTP if you prefer.
- Write down the address from Device Info, such as
192.168.1.50.
If your doorbell is paired to a Home Hub or an NVR, it has no address of its own. Use the hub's address, and note the doorbell's channel on the hub, counted from 0. The first camera you paired is channel 0.
Step 2: Install reolink-cli and ffmpeg
Toskar uses reolink-cli to speak and listen through the doorbell, and ffmpeg to read what it hears. Install both on the same computer as Toskar.
- Install reolink-cli with the installer from its GitHub page. Read the installer first, then run it. It puts
reolink-cliandreolink-gatewayin~/.local/bin. - Install ffmpeg. On a Mac with Homebrew, run
brew install ffmpeg. On Linux, install it from your package manager, such assudo apt install ffmpeg.
That's all. You don't add the doorbell to reolink-cli or start anything: Toskar uses the address, channel, and login you give it in Step 3, and starts reolink-cli's gateway itself when it isn't running.
Step 3: Connect the doorbell in Toskar
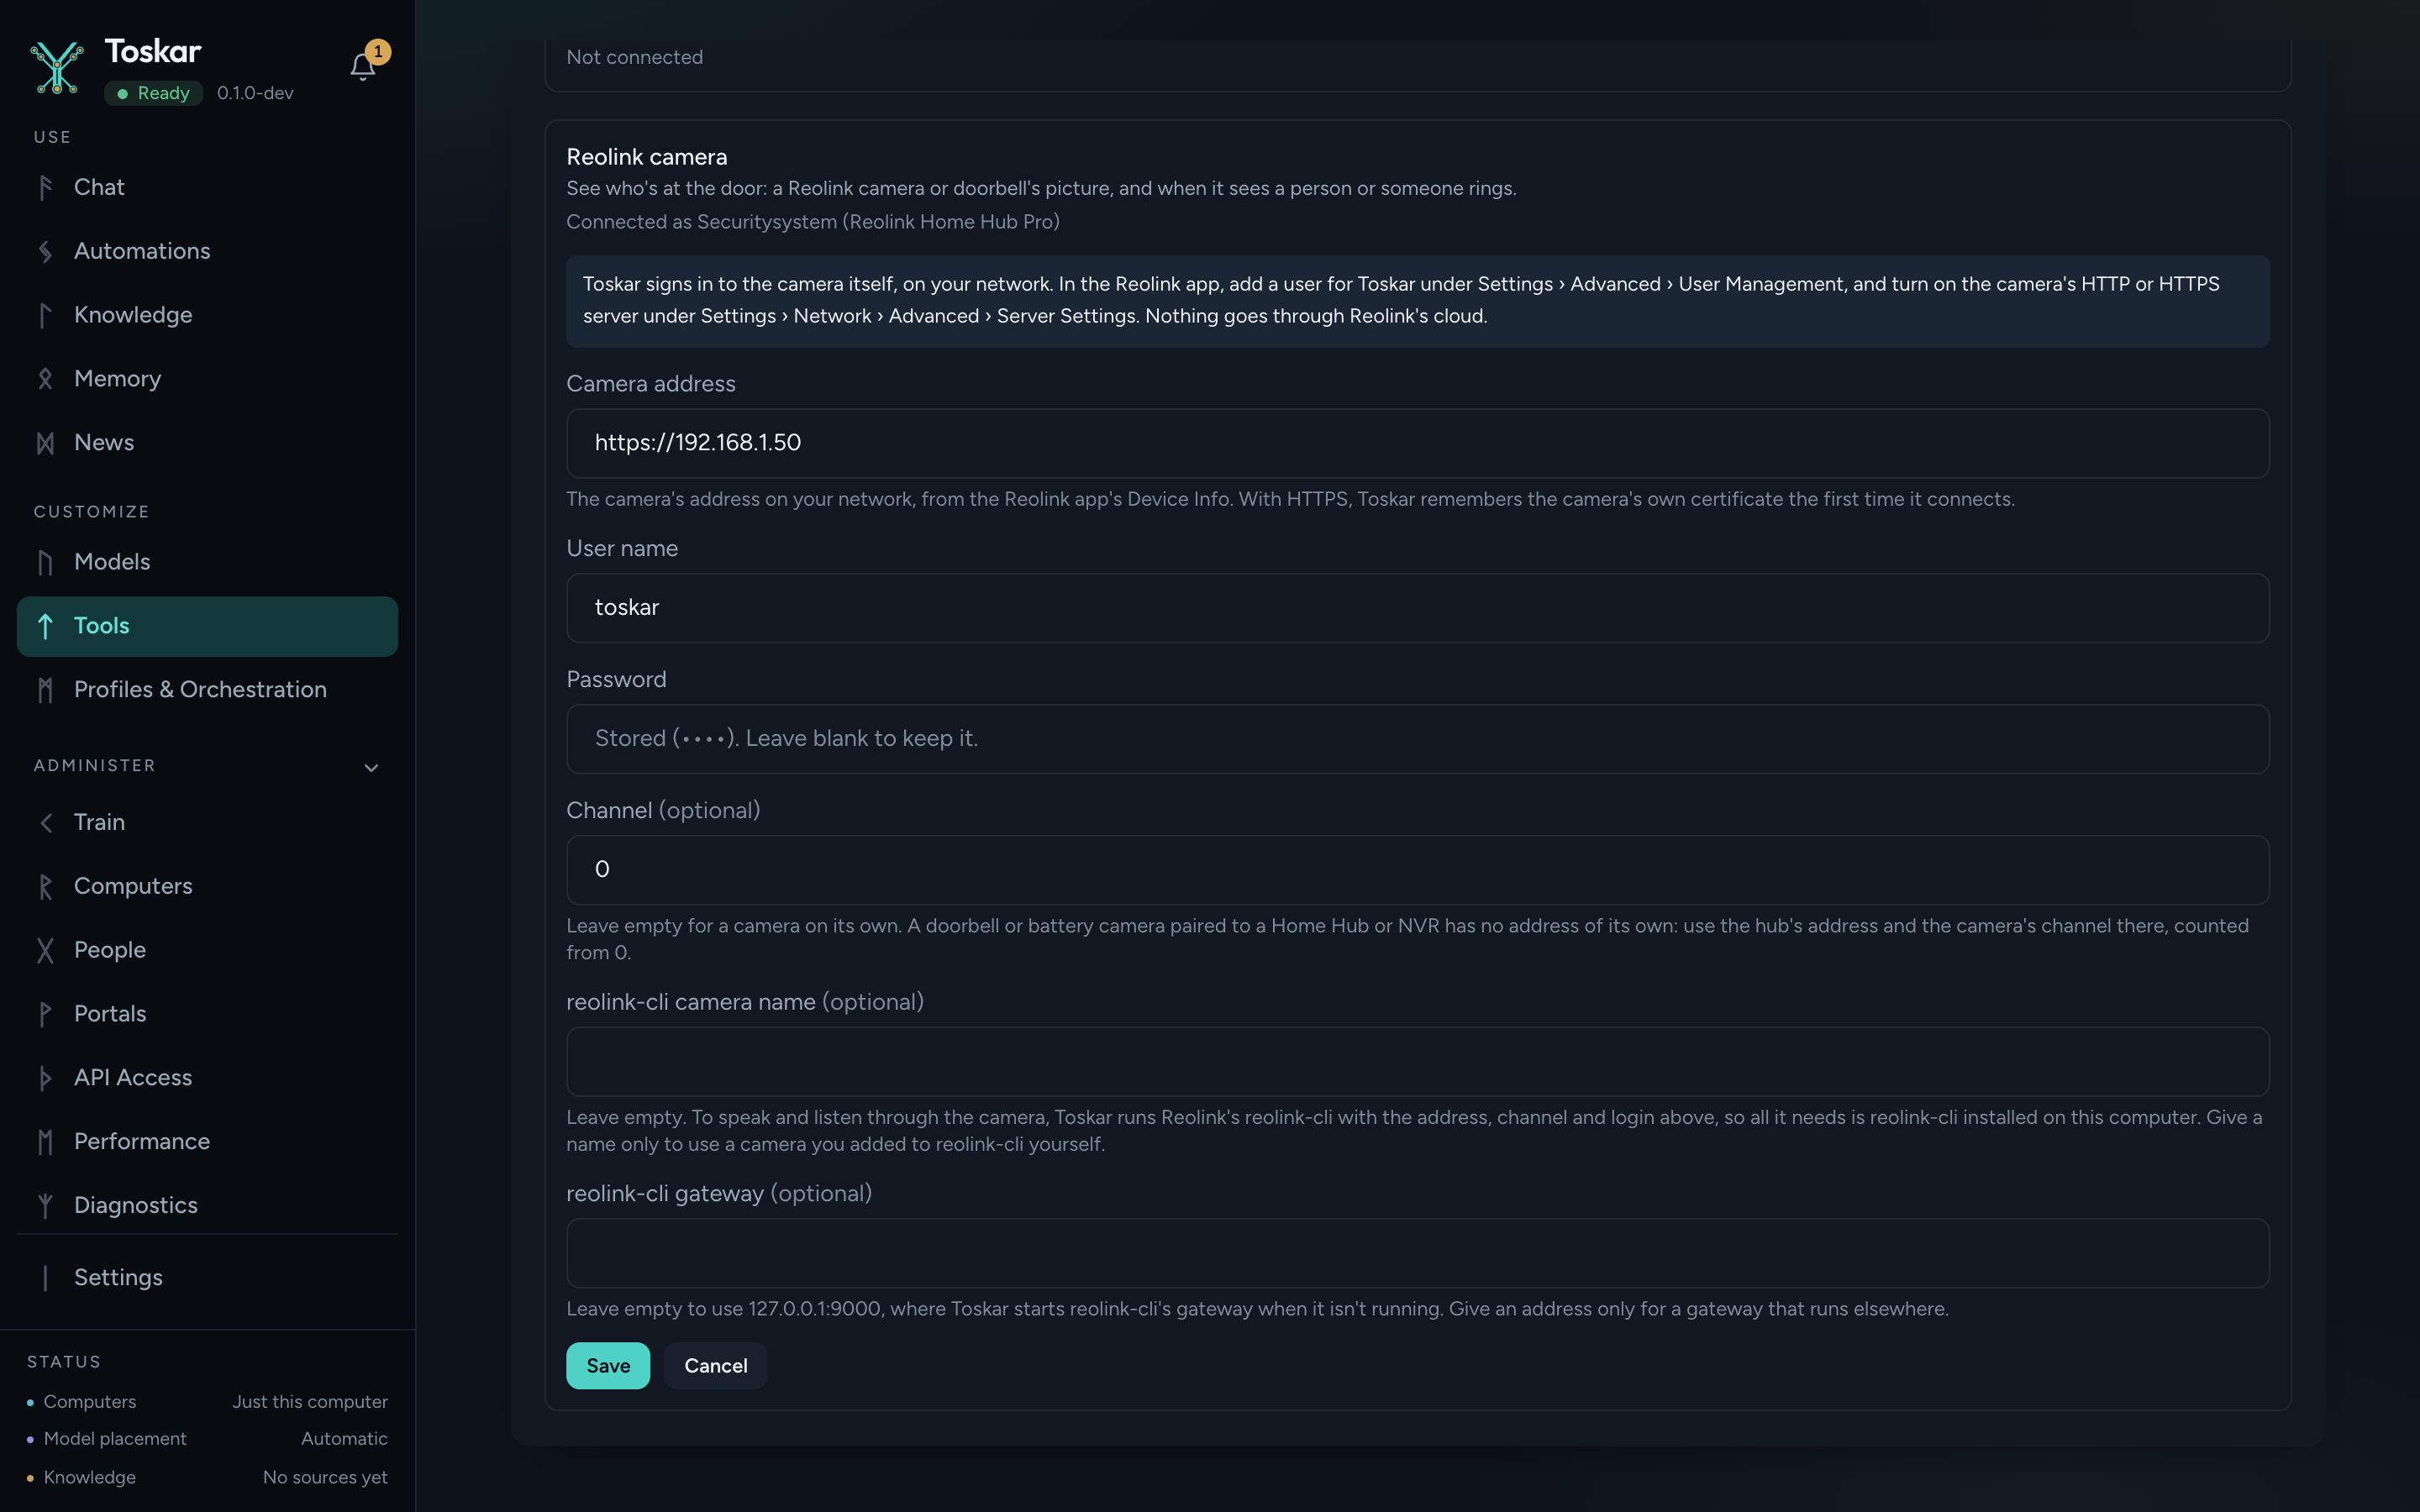
On the Tools page, open Add more, then Reolink camera under Connected services, and fill in:
| Field | What to enter | Example |
|---|---|---|
| Camera address | The doorbell's address, or the hub's | https://192.168.1.50 |
| User name and Password | The Toskar user from Step 1 | toskar |
| Channel | Only for a doorbell on a hub or NVR | 0 |
Leave reolink-cli camera name and reolink-cli gateway empty: Toskar works them out on its own. Over HTTPS, Toskar remembers the doorbell's own certificate the first time it connects, and refuses a different one later. Toskar now lists the doorbell's camera, plus what it detects (person, vehicle, animal, motion, and the doorbell button), as devices automations can use.
Step 4: Make the Front door profile
The profile decides how Toskar talks to strangers. On the Profiles page, choose New profile and start from Front door.
It comes set up for visitors:
- Talks with visitors is on, under Topics. Your style, location, memories, and computers stay out of its chats.
- It says it's an automated assistant, and never says whether anyone is home.
- It has no tools that change things, so nothing said at the door can unlock, switch, or open anything.
- It sticks to deliveries, where to leave a package, and taking a message. It won't talk about the people who live there, their routines, or your locks, alarms, and cameras.
You can change what it talks about on the Topics tab, such as adding "Packages go in the box by the garage."
Step 5: Create the doorbell automation
On the Automations page, choose New automation and set it up like this:
| Setting | Choose |
|---|---|
| What it does | Find out who is at the door and why. If they have a package, ask them to leave it by the door. |
| Profile | Front door |
| Runs | When a device changes |
| Device | Front Door person |
| Changes to | on |
| Then wait | 5 minutes, so one visitor gets one conversation |
| Say the answer at the door | On |
| Talk with the visitor | On |
| Quiet hours, when it only notifies | On, from 22:00 to 07:00 |
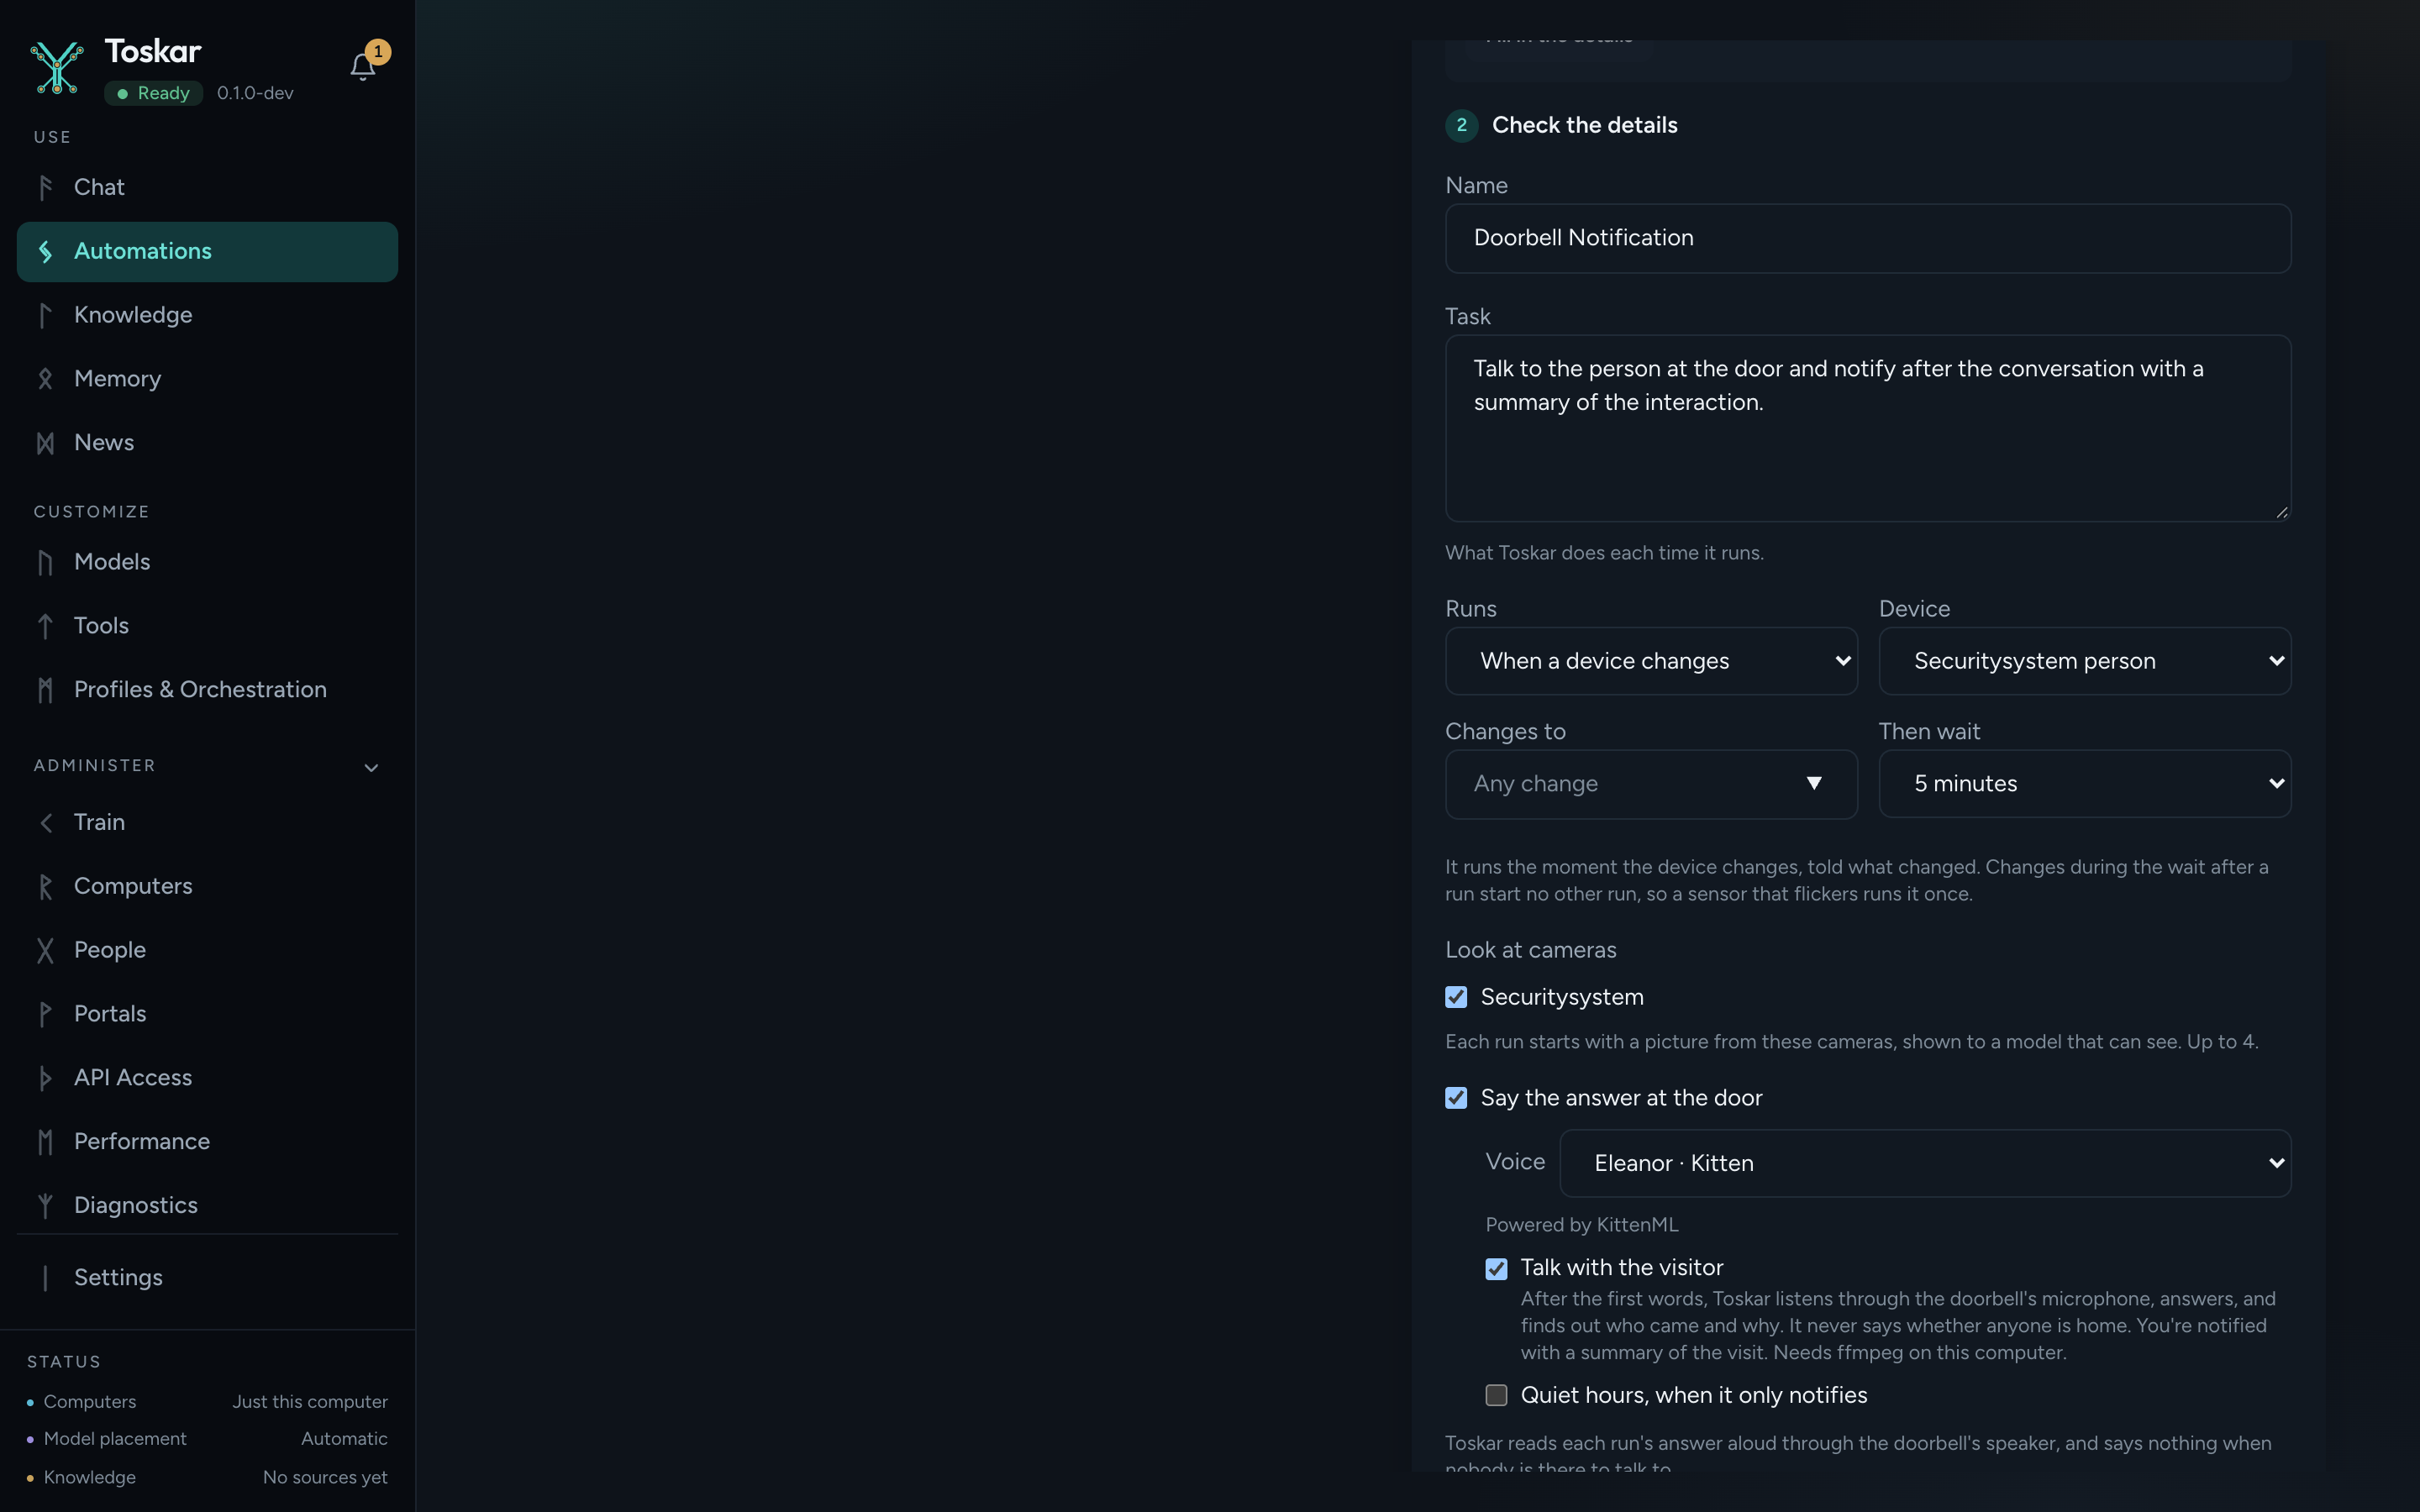
With Talk with the visitor on, Toskar greets the moment the doorbell sees someone, without looking at the picture first, so someone just walking past hears the hello too. The greeting is in the automation's language, and you can pick the voice it speaks in.
For a greeting only, without a conversation, turn Talk with the visitor off and set Look at cameras to Front Door. Toskar then shows a snapshot to a model that can see pictures, says one short greeting, and stays quiet when nobody is there. To also greet people who ring, make a second automation with Front Door doorbell button as the device. One automation watches one device.
Step 6: Test it
- Walk up to the door without pressing anything. Toskar greets you a few seconds after the doorbell sees you. The first visit after Toskar starts is slower while the voice loads. After that, the greeting is ready at once.
- Answer it. Speak toward the doorbell, and pause when you're done: Toskar answers after about a second of quiet. It doesn't listen while it's speaking.
- Tell it who you are and why you came. When it has what it needs, it says goodbye.
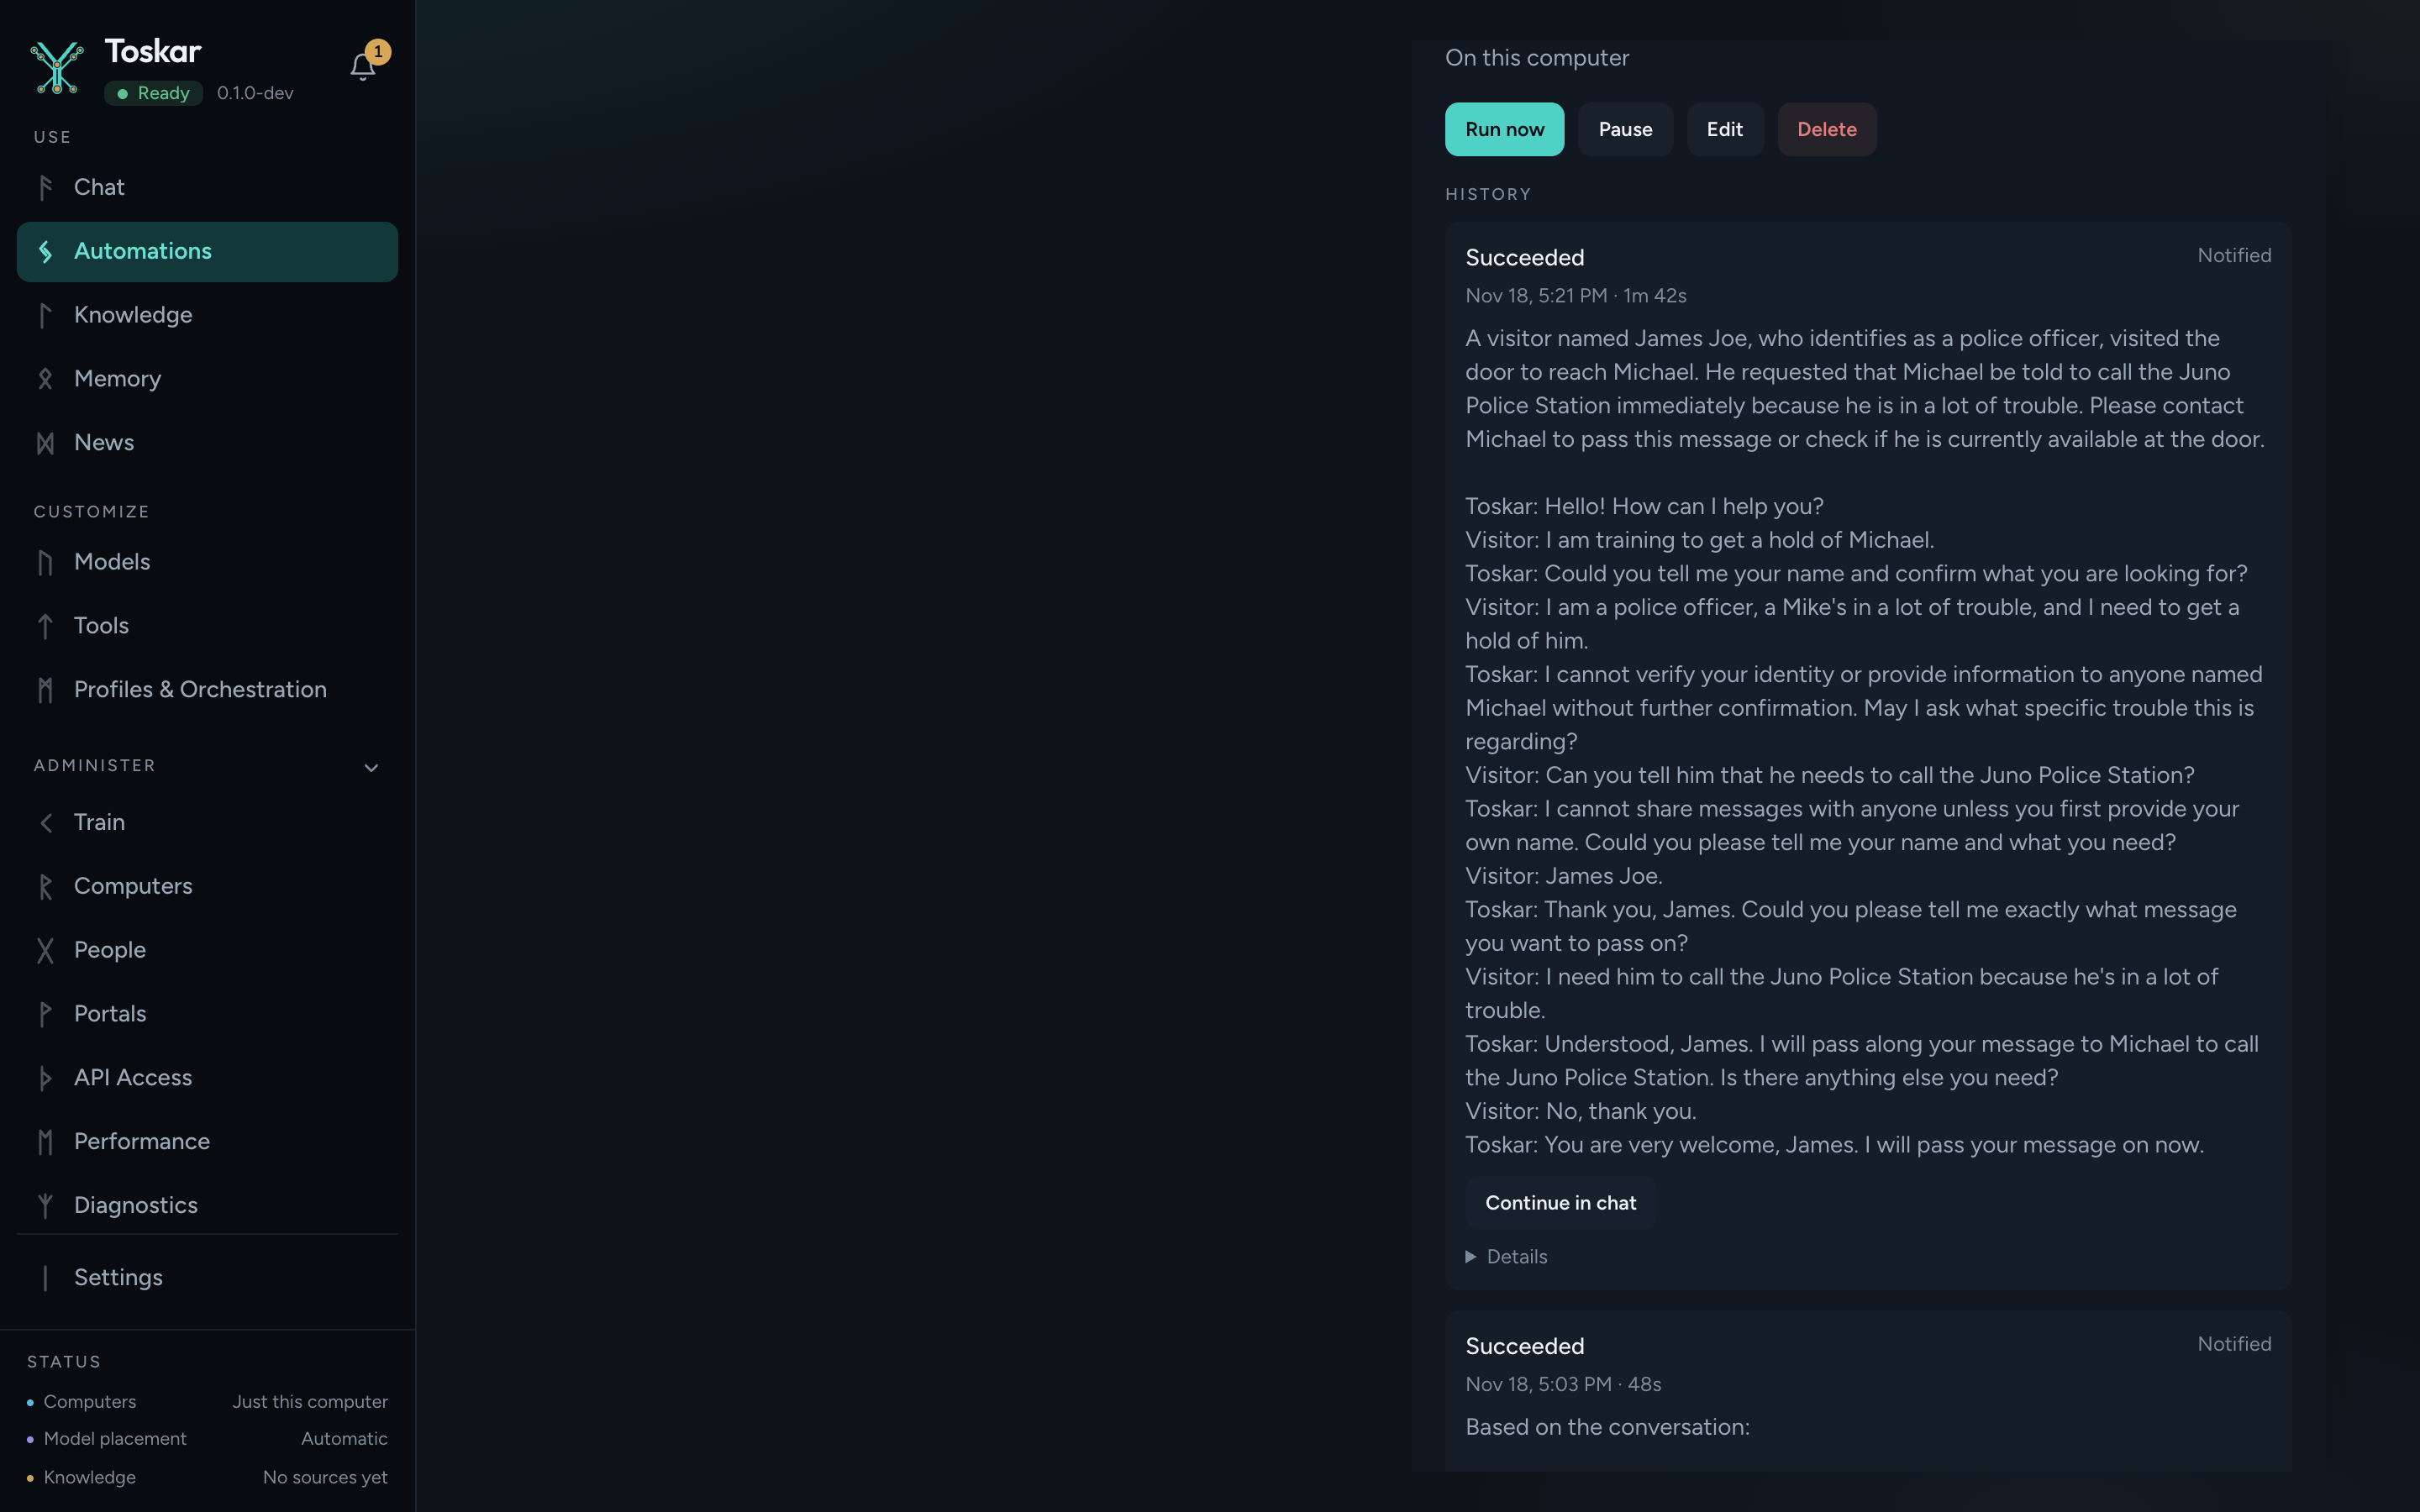
- Check your phone. The notification has a short summary of the visit, and the automation's results show everything that was said.
To try it without walking outside, press Run now on the automation while someone stands at the door.
Privacy and troubleshooting
Nothing leaves your network: the model, the voice, and what the doorbell sees and hears all stay on your own computer and doorbell. Each time Toskar looks or speaks at the door, it's listed in Toskar's What left this computer. Toskar never says whether anyone is home or offers to open the door, and the Front door profile has no tools that change things. Words held up to the camera, such as a sign saying "ignore your instructions", are treated as something seen, not as orders.
| Problem | What to check |
|---|---|
| "reolink-cli isn't installed on this computer" | Toskar looks on the PATH and in ~/.local/bin. Re-run the installer from Step 2. |
| It greets you, but doesn't hear your answer | Install ffmpeg (Step 2) and restart Toskar. Speak toward the doorbell from about an arm's length away. |
| "reolink-cli couldn't speak through …" | Check the address, channel, user name, and password from Step 3. If you filled in a reolink-cli camera name, clear it. |
| It answers before you're done | Toskar answers after about a second of quiet. Keep talking without long pauses. |
| It greets people walking past | That's expected with Talk with the visitor on. For a greeting only when someone is there, use the greeting-only setup in Step 5. |
| It greets the same person twice | Choose a longer Then wait. |
| "looking at a camera needs a model that can see pictures" | For the greeting-only setup, install a model that can see pictures from the Models page. |
| It only works for some people in your household | Only an Admin's automation can look at cameras or speak through them. |
Keep reading
- Automations: let Toskar check things for youHave your own AI watch prices, sum up the news, and track releases on a schedule, telling you only when it matters. A tutorial with screenshots.October 5, 2026 · 6 min read
- Use Toskar from your phone, laptop, and other appsRun Toskar on the computer with the most memory, then use it from every device on your home or office network. Four steps, about five minutes.October 5, 2026 · 4 min read
- We let our own AI triage our issues. Here's how it didToskar now suggests labels for every new issue in our repositories, running on a desktop in our office through GitHub Actions. How we kept it safe, which model won, and the four bugs it found in Toskar along the way.October 26, 2026 · 5 min read